Help
Ask anything. Most answers take a minute to read.
Try another word, or write to hello@bubbleme.bio and we’ll reply.
For creators
Your first 5 minutes
- Ask for an invite. You need to be 18 or over. When it arrives, sign up and confirm your email.
- Pick your handle. It’s your address, like bubbleme.bio/@ines.fires.
- If you’re on Linktree, paste your address and your links come over. Otherwise, choose Start from scratch.
- Add your name, photo and bio.
- Pick a look. It sets your colours, fonts and buttons in one go, and the Editor has every setting when you want more.
- Add a few links. Most people start with their latest video and a way to get in touch.
- Press Go live. Nothing is public until you do. Confirm your email within 24 hours to keep your bubble up.
- Put your link in your Instagram or TikTok bio.
For businesses
Set up your business
- Sign up as a business (or pick “For a business” on the first step of set-up) and choose your kind. Your bubble starts with the right parts.
- Add your logo and colour, then confirm your email to create the business.
- Add your menu, services or prices.
- Add your address and opening hours.
- Press Go live.
- Print a QR code for your window or tables.
- Day to day, change your hours, specials and what’s sold out in Today (or Right now on Home).
- Confirm your business.
Getting started
Do I need an invite?
For now, yes. bubbleme is in early access, by invite. An invite is a link from someone already on bubbleme, or from us. Open it and you can sign up straight away, or type its code into the Invite code box on the join page.
Without one, ask us for one: leave your email (and the handle you’d like) under “Ask for an invite” on the home page, For creators or For businesses. We open bubbleme in waves, oldest requests first. When you ask, we email you a private link to your place in line (lost it? get it again on Your place in line). When your wave goes out, your invite comes by email. It works once, only with your address, and keeps for 14 days, with one reminder before it runs out.
What’s coming soon
These are on their way. None of them has a date yet.
- The bubbleme app for iPhone
- Opening hours kept in step with Google
Signing up and confirming your email
Open your invite link, or go to the join page and type the code in. Choose A creator or A business, tick that you’re 18 or older and agree to the Terms and Privacy Policy, then add your email and a password of at least 10 characters. Or choose Continue with Apple or Continue with Google (see Signing in with Apple or Google).
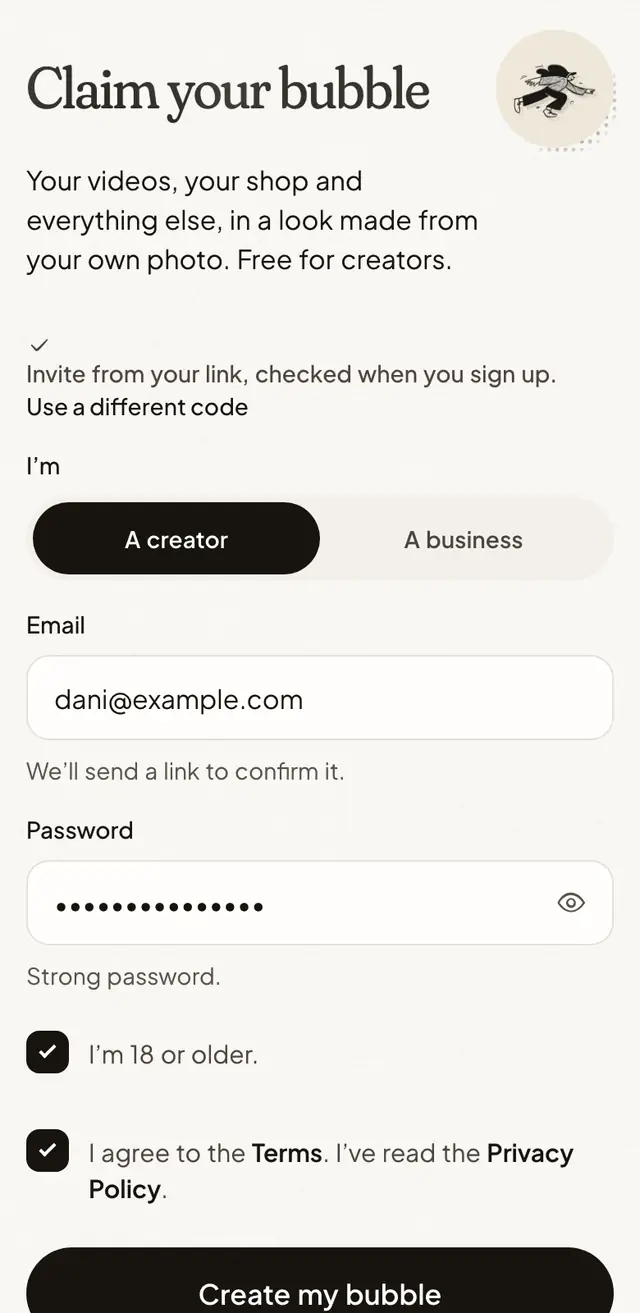
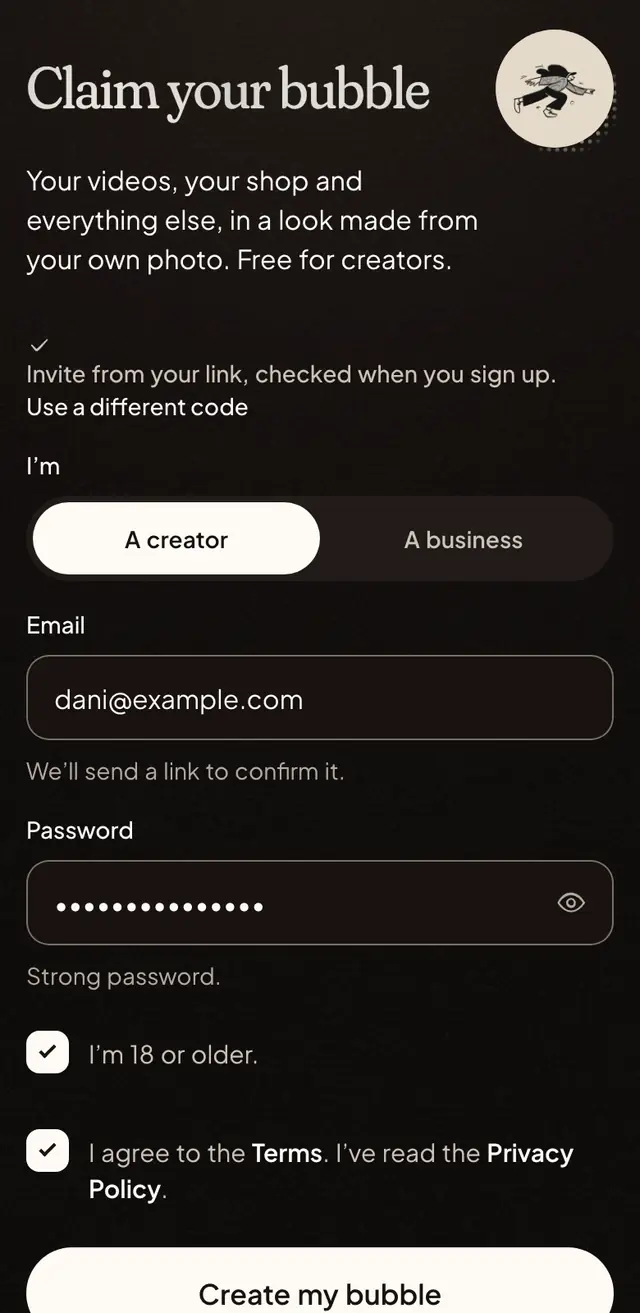
We email you a link to confirm your address, and it works for 24 hours. As a creator you can set up and go live while you wait: confirm within 24 hours of signing up to keep your bubble up. A business confirms during set-up. If it hasn’t come, look in spam, then open Trouble with the email? where set-up is waiting and choose Send it again (businesses see Send the link again), or send it again in Settings under Email.
Set-up then asks for your handle, your name and photo, a look and your first links, and ends with Go live.
Choosing your handle
Your handle is your address, like bubbleme.bio/@ines.fires. Handles use 2 to 30 letters, numbers, dots and underscores, with no dot at the start or end and no two dots in a row. Creators and businesses share the same set of names. Names that only differ by a dot, underscore or hyphen count as one, and a few words are kept back, like anything with “bubbleme” in it. So nobody else can take yours.
It’s yours from the moment you claim it, as long as you use it: a handle that hasn’t been published for 12 months can be reclaimed after 30 days’ notice by email. You can change it later in Settings (see Changing your handle).
Moving from Linktree
During set-up, choose I have a page elsewhere, paste your Linktree address, tick the box to say the page is yours (or you’re allowed to use it) and choose Move in. We read your public Linktree once and copy your photo (moving ones too), bio, links, pictures, videos, products and colours into a draft, then show you 3 looks matched to your old style.
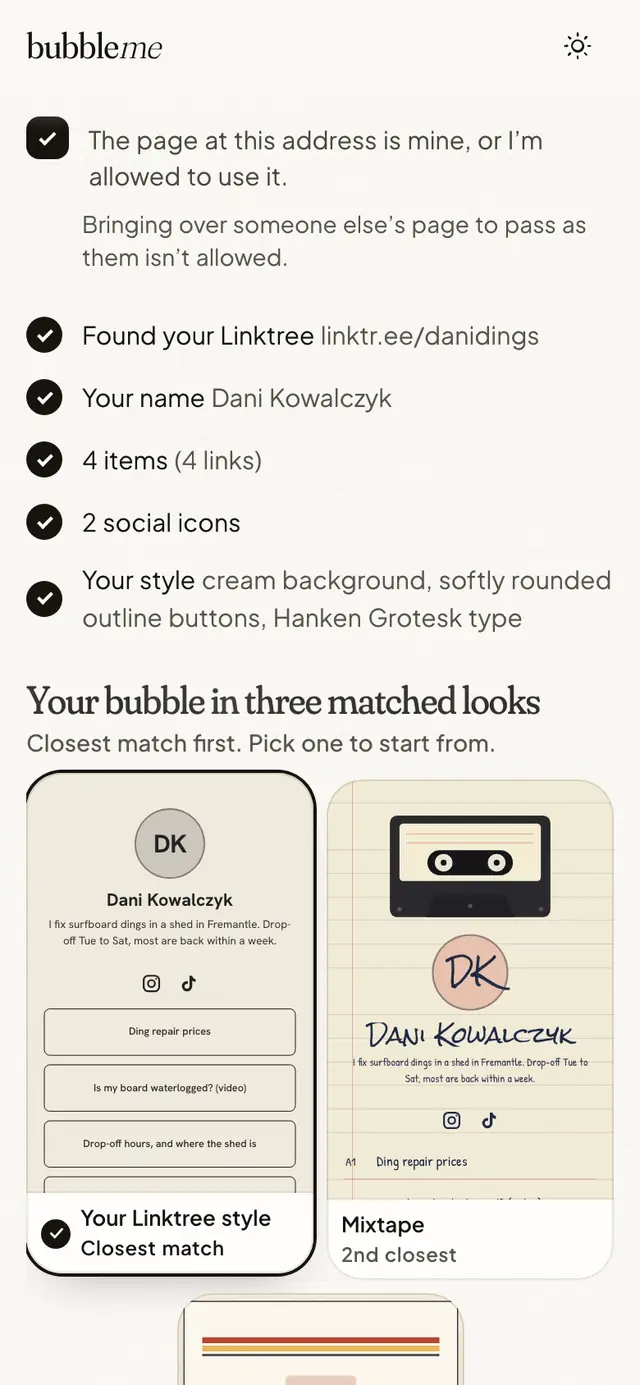
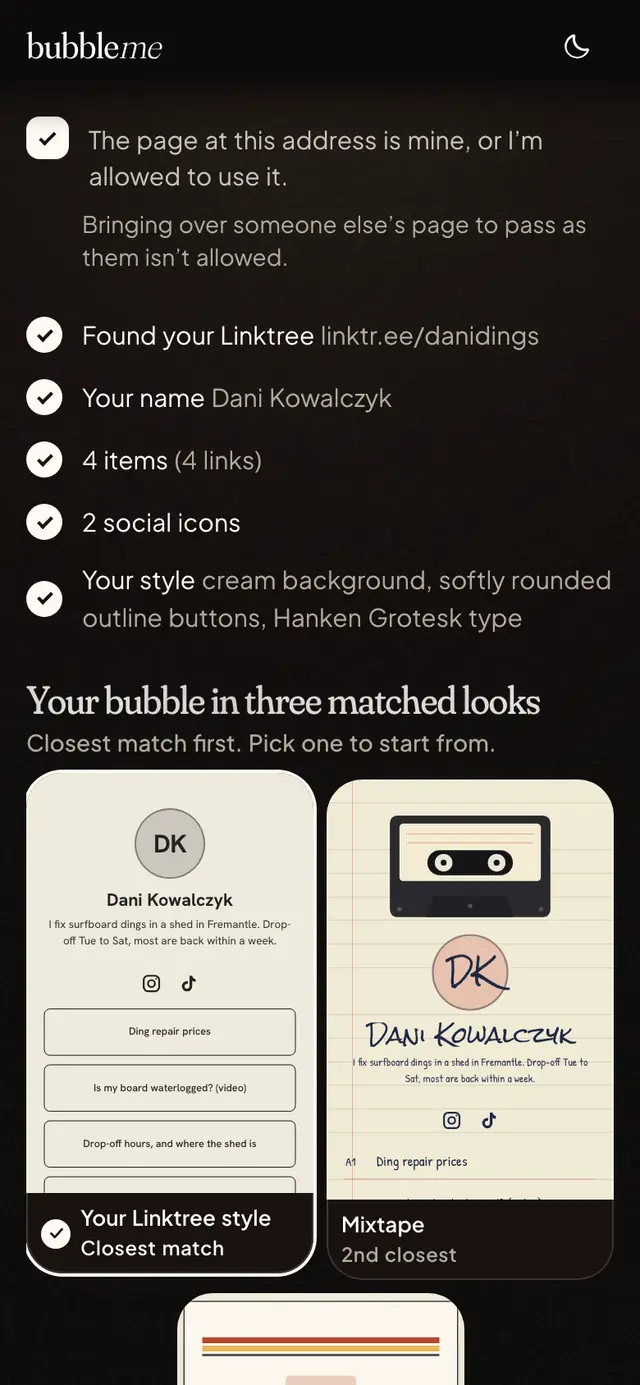
If you started fresh, or added links on Linktree since, choose Move in from Linktree and more on Home (while your bubble has fewer than 3 links) or in Settings any time. It works the same way, and what you keep is added to your bubble instead of replacing it.
You check everything before it goes anywhere: switch off what you don’t want, rename titles, and choose whether social icons sit at the top or the bottom. Nothing changes on Linktree itself.
If we can’t read your Linktree, choose Or paste your links instead and paste them as text, one per line with its title. Social profiles become icons.
You can only bring over a page that’s yours, or one you’re allowed to use. A verified Linktree needs one more step: see Moving a verified Linktree.
The page on moving lists what comes over and what stays on Linktree.
Moving from Beacons, Komi, Stan, Carrd and other pages
Move in also reads Stan and Carrd pages, and most other public link-in-bio addresses. Paste the address the same way. We read the page once, after checking the site allows it, and change nothing there.
Links, headings, text, your photo, name and bio come over, with videos and songs as players where we can, and a message form becomes a Contact form. Your old colours stay behind, so you pick a look here. Products, courses, coaching and downloads on Stan, Komi or Beacons stay there: each one comes over as a link to it on that site, which you can switch off in the check. bubbleme doesn’t sell anything for you. Anything that doesn’t come over is listed by name in the check before you save.
Beacons and Komi don’t let other sites read their pages, so for those, paste your links: the paste box opens as soon as you type the address. On that page, select everything, copy it and paste it in. We pick out the links and their titles. The same works for any site that won’t let us read it, or a page where we find no links. Bento has closed: see Coming from Bento?.
Or, any time, choose Or paste your links instead and type them, one per line with its title. Social profiles become icons.
Coming from Bento?
Bento closed in February 2026 and sent its users to Linktree. If yours moved there, choose I have a page elsewhere during set-up and paste your Linktree address. Your old bento.me address works too: Move in follows it to that Linktree. If it didn’t move, choose Or paste your links instead and paste them one per line, each with its title.
For a grid like the one you had, open Layout in the Editor and choose Tiles. Links, pictures and galleries become tiles, 2 across on a phone and 4 on a computer. Set each one’s size (1×1, 2×1 or 2×2) in the block’s settings. Tile sizes don’t come over, so you set them here. The Tiles layout is free.
Moving a verified Linktree
If Linktree has verified a page (the blue tick), or it belongs to someone well known, only its owner can move it to bubbleme, and only to one bubble.
To show it’s you, Move in gives you a short code, like bm-482193. Put it anywhere in your Linktree bio, come back and choose Check again: we read your public Linktree once more, see the code, and the move carries on. Only you can change your bio, so nobody else can do it. The code is good for 2 hours, and you can take it out again whenever you like. Linktree can take a minute to show a change, so if it isn’t found straight away, wait a moment and check again.
You can connect Instagram, TikTok or YouTube instead and sign in on that app’s own page. It works with an account shown as one of your Linktree’s social icons, or one with the same name as your Linktree (linktr.ee/ines.fires and @ines.fires). Accounts your Linktree only links to as buttons, like a brand or a friend, don’t count.
If you’d rather not wait, choose Or paste your links instead and bring your links over by hand.
If we invited you personally, we may have checked it’s you already. Sign up with the email the invite went to and your Linktree moves in with nothing to check.
If your verified Linktree has no links on it yet, there’s nothing to bring over and nothing to check: start fresh instead.
If we say the Linktree has already moved to bubbleme and it’s yours, email hello@bubbleme.bio and we’ll sort it out.
A handle that’s kept for someone
Handles of very well-known people, and handles made to look like them, are kept for their owners so nobody gets there first. That goes for business bubbles too. If one is yours, pick another handle for now and email hello@bubbleme.bio from your account’s address: we’ll check it’s you and help you switch. If we invited you, the handle we kept for you is already filled in.
Going live
Your changes save as you go, but visitors only see your bubble once you press Go live. It needs at least one link first.
After that, the button says Publish whenever you have changes visitors haven’t seen yet, and Live when they’re up to date. Publish again to update your bubble.
You can go live straight away and confirm your email within 24 hours of signing up to keep your bubble up. Until you confirm, it stays out of search. If more than 24 hours have passed, Go live waits for you to confirm first and then publishes by itself. The email has a 6-digit code too: type it where you’re setting up, which is quickest if you signed up inside Instagram or TikTok (their links open in another browser). If you open the link on another device, it asks for the 6-digit code shown where you’re setting up. Settings can send the link and a new code again.
A handle you claim before confirming is held for you for a day, and it’s yours for good once you confirm.
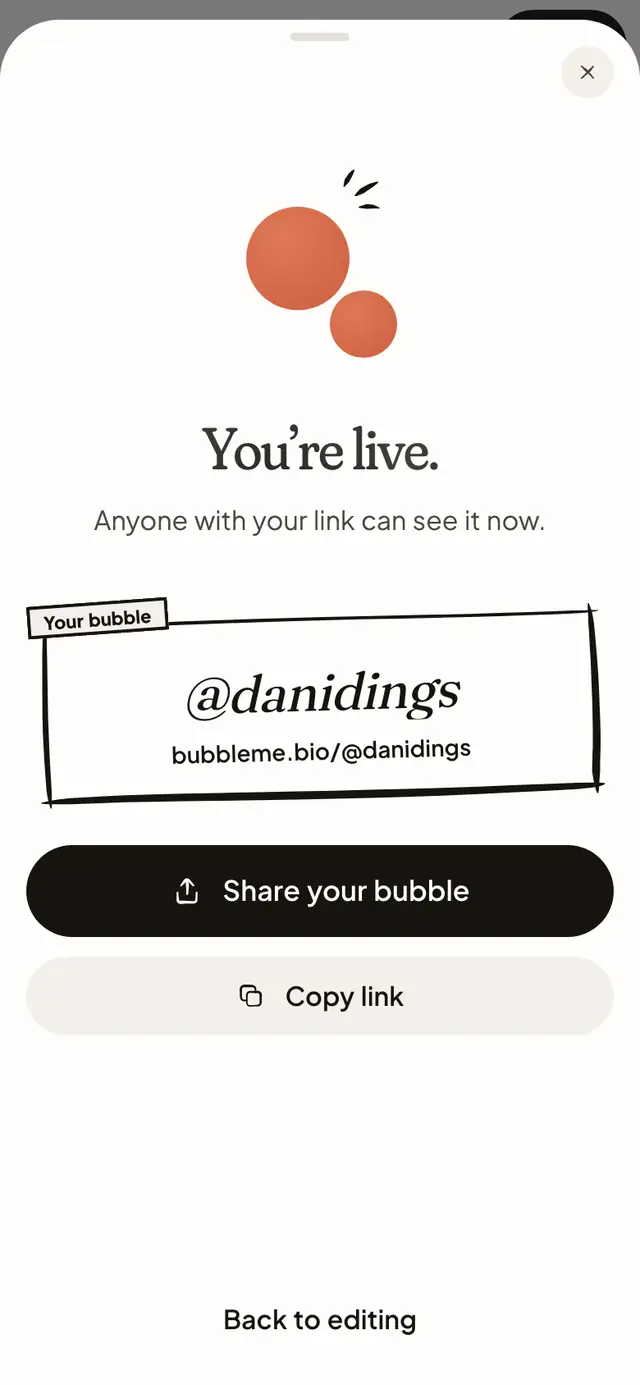
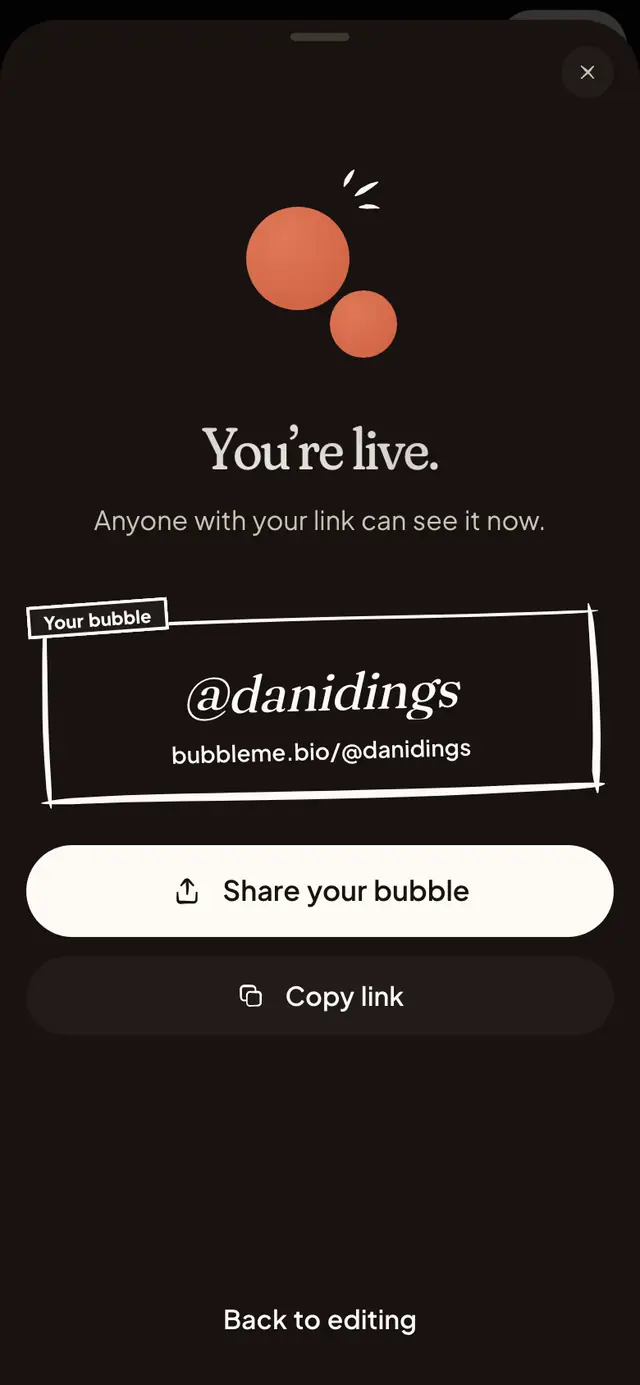
The first time your bubble goes live, “You’re live.” shows your link with Share your bubble and Copy link. On a phone, Share your bubble opens your phone’s own share sheet. On a computer it opens the Share sheet, with your QR code, a Story card and the steps for putting the link in your bio. At the end of set-up, the QR code, bio steps and Story card are right on the page.
Editing your bubble
Editing on your phone
On a phone, the Editor shows your bubble across the whole screen, with a row of tools under your thumb: Add, Draw, Stickers, Cut out, Look and More. A brand-new bubble starts with just Add a link, Look and More; tap More for the rest.
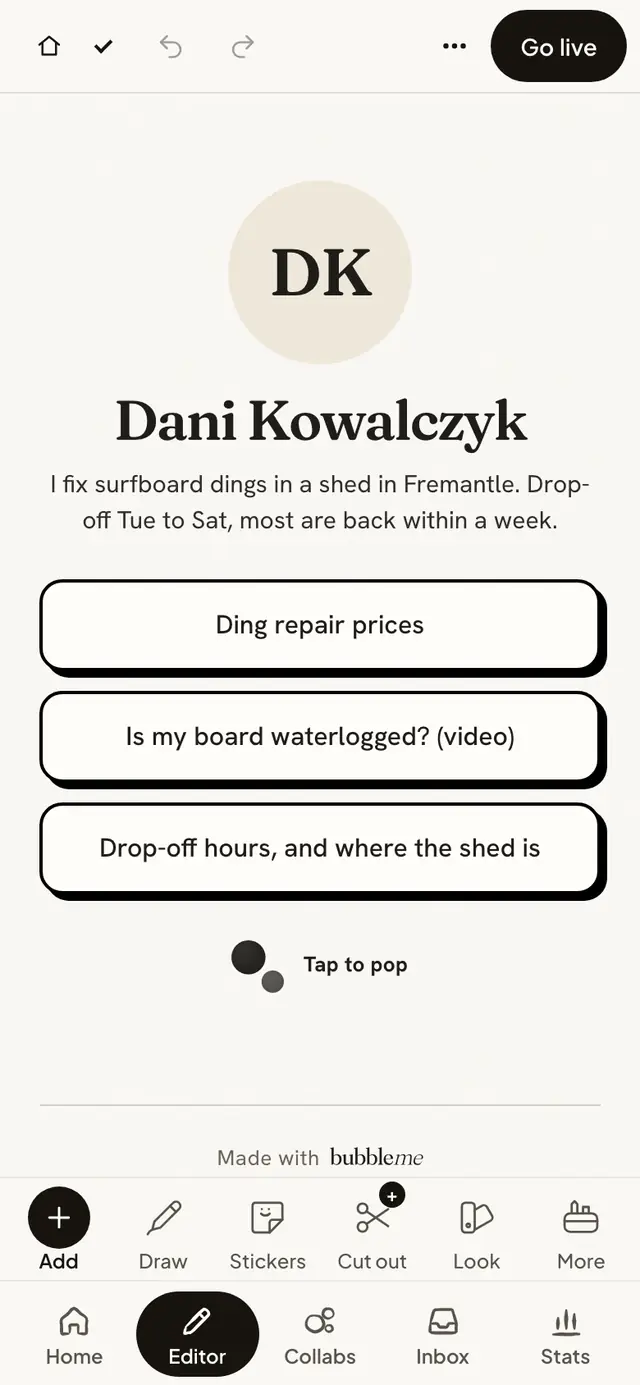
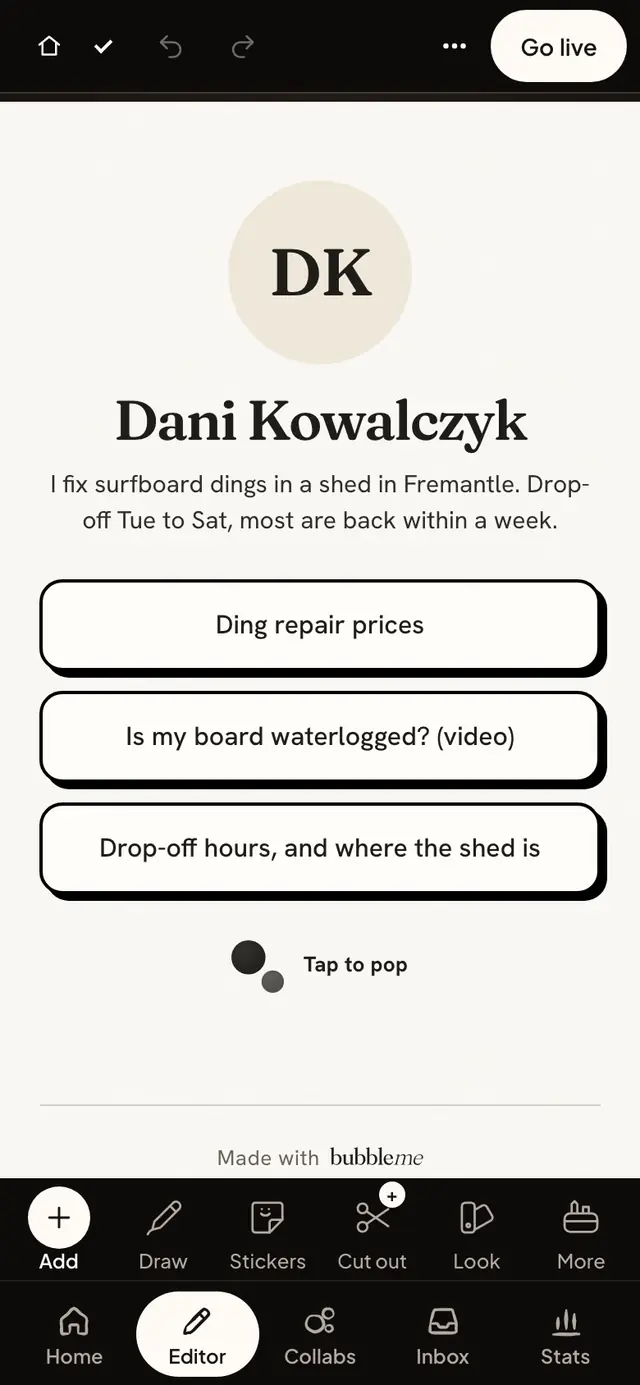
Tap a block on your bubble to edit it, or press and hold one to move it. Tap your photo to choose, take, frame or remove it. Tap your name to open Profile, where your name, bio, cover and the settings for your whole bubble live.
Look opens a sheet with Looks, Colours, Font, Buttons and Layout. More has Links, a list of everything on your bubble to put in order (your name at the top opens Profile too), Layout and Hide “Made with bubbleme”. The ··· at the top holds Preview as a visitor, Share, Publish later, History and Help.
Draw, Stickers and Cut out always show a way out: Done or Cancel, a swipe down on the sheet, or your phone’s Back.
Looks and saved looks
A look sets your colours, fonts, buttons and background in one go. Switching looks never touches your links. Undo brings back the one before.
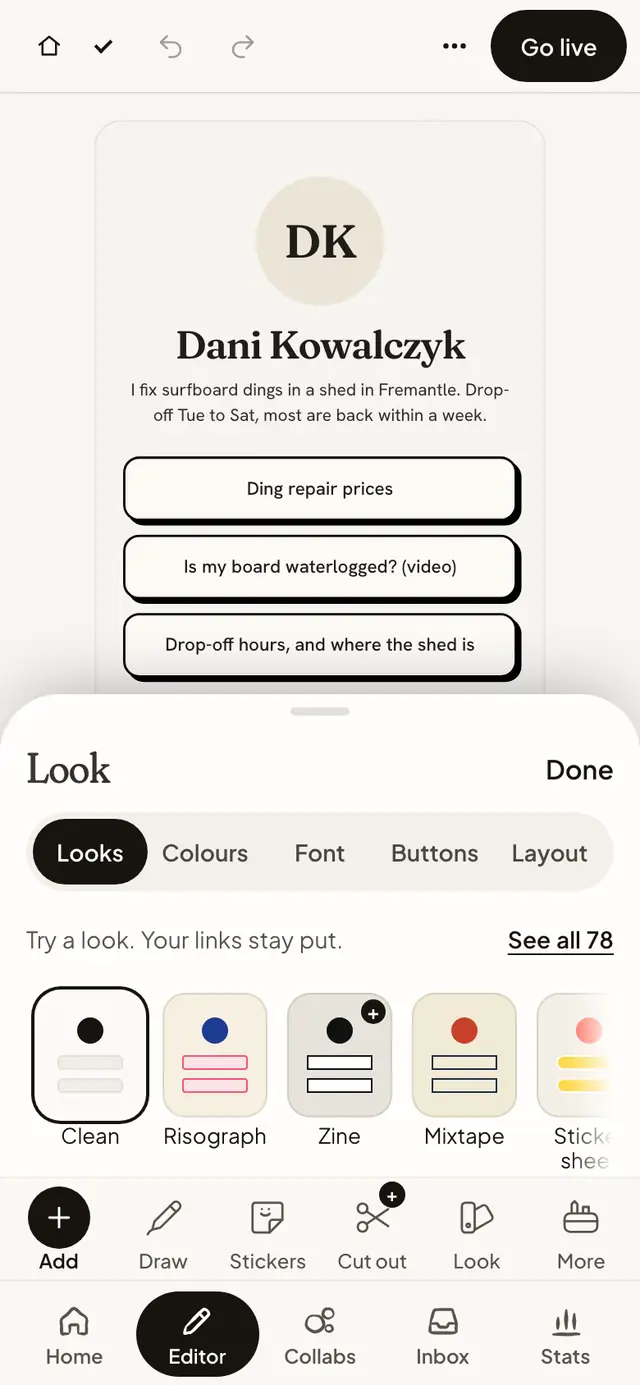
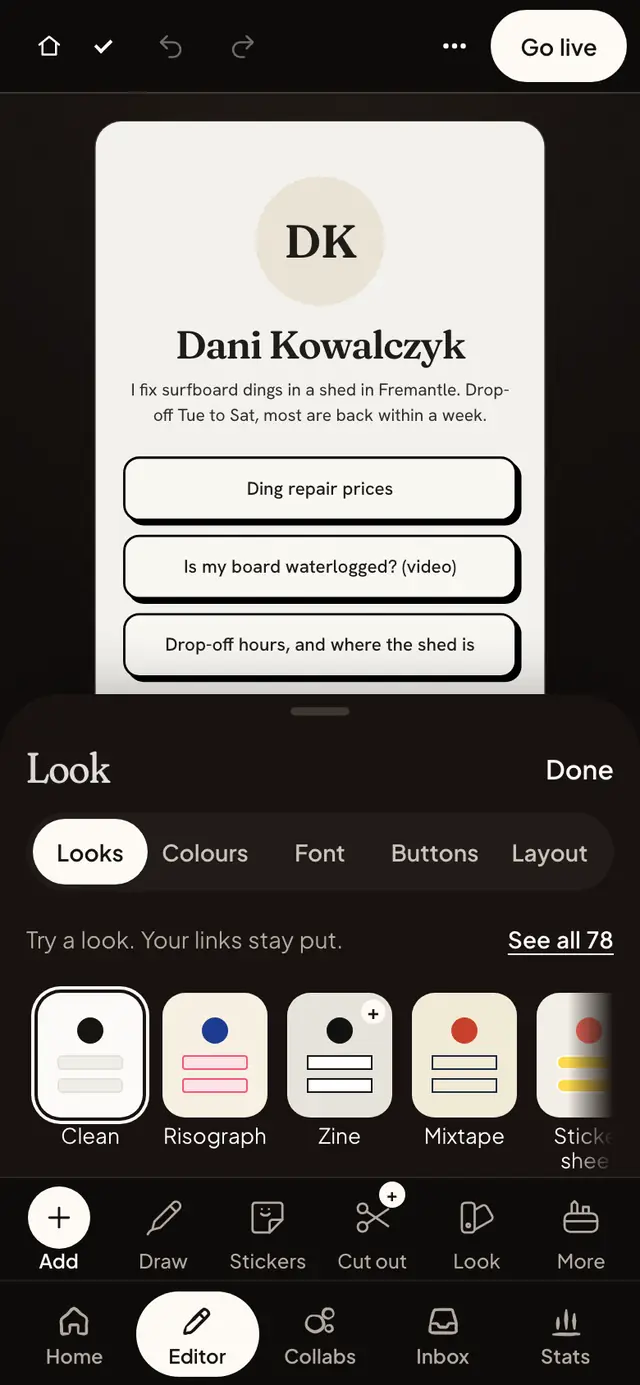
Tap a look to try it on; See all lists every one. Shuffle makes a new look in your colours, and Make your own (or Design your own look in See all) walks you through one from scratch. To keep a look you’ve made, choose Save this look. On Free, your first 3 saved looks can show on your published bubble.
Looks marked + use bubble+ touches. See What happens to bubble+ touches on Free.
Stickers, header styles and GIFs
In the Editor’s Profile panel, Header style swaps your look’s header for one of three: Big cover (your cover photo across the top, with your name on a card over it), Side by side (your photo beside your name and bio) or Collage (your photo as a print with your cover tucked behind it). They keep your look’s colours, in light and dark.
Stickers puts up to 6 of our drawn stickers on your header. Drag them around on the preview, or use the sliders to move, turn and resize them. For one between your blocks, add a Sticker block. Visitors can’t tap a sticker, so your links stay easy to reach. Your own stickers (a PNG or WebP with a clear background works best) go live with bubble+.
A GIF or moving WebP keeps moving in an Image block, as your cover or as a sticker. We make it smaller so your bubble stays quick, and anyone who has asked their phone for less motion sees its first frame. Up to 3 MB and 300 frames.
Drawing, stickers and cut-outs
Draw lets you write and doodle straight on your bubble with a Fineliner, Brush or Marker, in your look’s own colours. Rubber rubs out, Undo and Redo step through what you did, and two fingers scroll while you draw. Choose Done to keep it.
Stickers opens our sticker sheet. Peel one off onto your bubble, then move it, size it or turn it, and choose whether it Floats or Stays put when someone scrolls. A bubble holds up to 24 stickers. Drawing and stickers are free for everyone.
Cut out is part of bubble+ (business+ for a business): pick a photo, trace round the thing you want with one finger (or Use the whole photo), then Place it and it lands on your bubble as a sticker.
A moving photo
In the Editor’s Profile panel, Moving photo plays a short video where your photo sits: in its frame, or across the top when your photo is the header. It plays muted on a loop. Your photo shows while it loads, and for anyone who has asked their phone for less motion. Add your photo first. MP4 or WebM, up to 3 MB.
A moving photo is part of bubble+. On bubble+, if your Linktree has a moving photo or header, Move in brings it over a moment after the rest; one over 3 MB is made smaller on your phone or computer first, so keep the page open until it’s in. On Free, Move in brings your photo over still and downloads nothing, and you can add the video later from the Editor.
Adding links and other blocks
Tap Add and paste a link into the box at the top (or tap Paste). It’s added, named from its page. Paste several at once and each becomes its own link. A bubble holds up to 100 blocks.
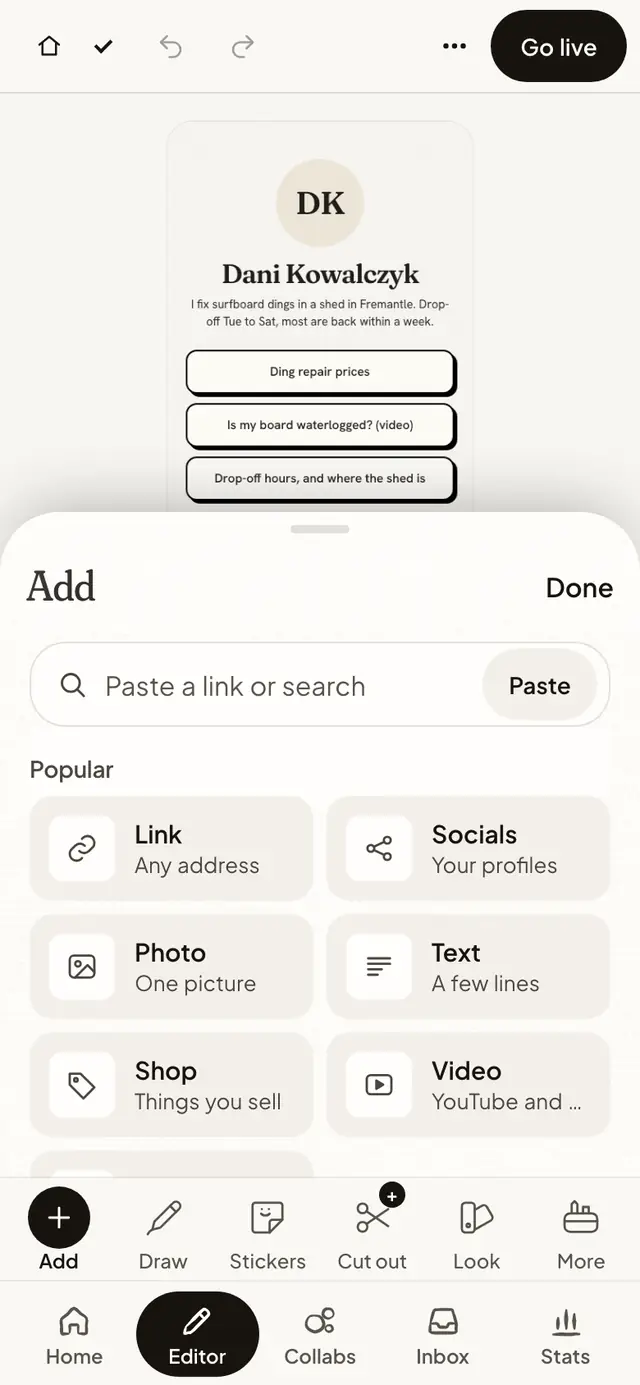
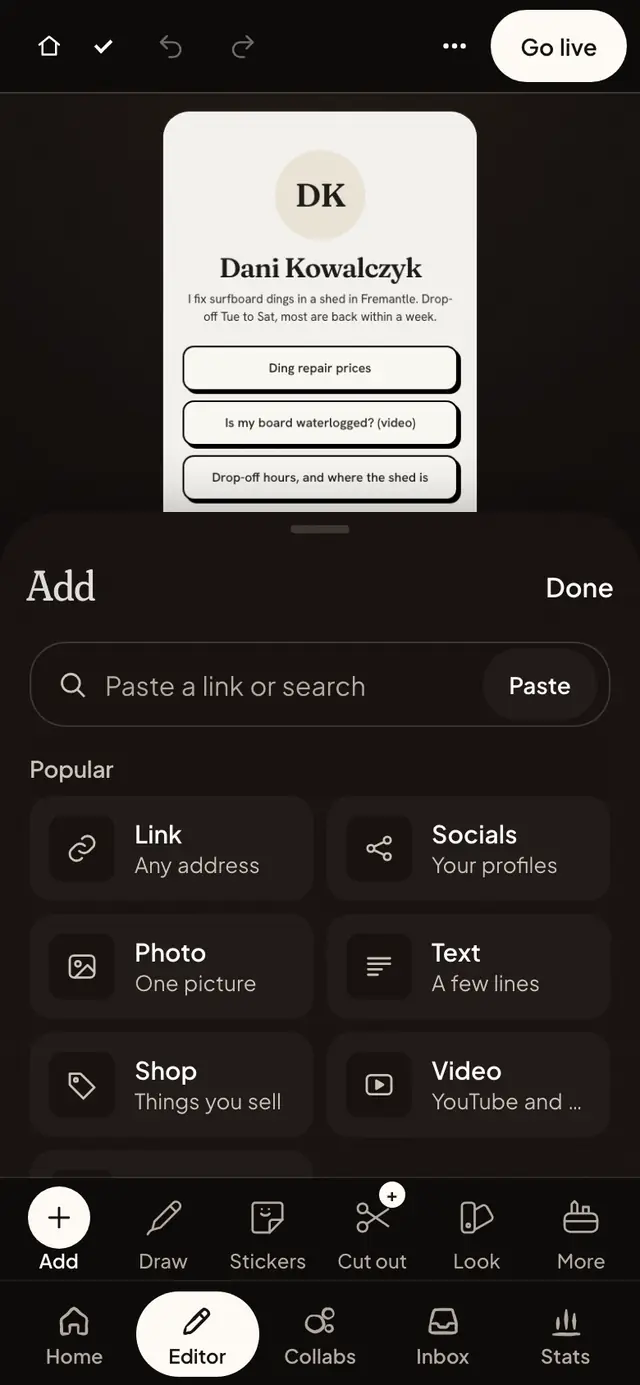
Besides links, you can add Socials, Photo, Text, Shop, Video, Music, Newsletter, Map, Contact, Calendar, Header, Divider, Spacer, Countdown, Collection, Questions, Quote, Sticker, Gallery, Now playing, Tour dates, Favourite places and Tip jar. The Add sheet lists them all in groups, and the box finds one by name too.
Any block can appear and disappear at times you set, and a Spotlight link stands out from the rest.
Paid partnership and gifted labels
If a brand paid you, or gave you something, to post a link, photo, video or anything else, say so. In Australia, paid and gifted content is expected to be clearly labelled as an ad. On bubbleme that’s one switch, and the label shows right above the item for everyone who visits.
In the Editor, open the block, then switch on Paid or gifted. Choose Paid partnership if you were paid, or Gifted if you were given the thing. Type the brand’s name and your bubble shows “Ad · Paid partnership with” or “Gifted by” that brand. You can do this on links, photos, galleries, videos, music, text, Picks and merch, tour dates and calendar links. Changing the brand’s name keeps the choice you made.
A labelled link also tells search engines it’s sponsored, and the label is read out by screen readers, so it can’t be missed. Picks and merch always says you may earn a small commission from affiliate links; you can also add a tag like Gifted to a single item.
The label is yours to switch on, and bubbleme doesn’t check your deals. If you’re not sure what counts, the ACCC and AANA have plain guidance on influencer advertising, and your own advice is better than ours.
Shine
Shine is a glossy finish for your photo, your buttons and floating links. Under Where it shows, switch each one on or off. You can drag the highlight to move where the light catches, and tap Save as my shine to keep a finish you like as your own.
Shine is free. Tilt glints, where the highlight follows your phone or pointer, and keeping more than 3 saved shines are part of bubble+.
Show and hide times
Any block can show only between two times: a link for a sale, a countdown until launch day, tour dates between tours. Select the block and press T, or open its settings and then Show and hide times. Quick picks set tomorrow at 9am, this weekend, 24 hours or a week.
Times follow your bubble’s time zone, which the settings name. Tap Change there if you’re somewhere else. In the Editor a timed block is dimmed with “Shows from” or “Hidden after” on it, and the Links list shows the same.
Editing on 2 devices
Edit on your phone and your computer as you like. When both change different things, bubbleme keeps both. If you changed the same thing in both places, it asks which to keep for just that thing. Coming back to a tab loads what you saved on the other device, and Undo takes it back.
When a call or another app interrupts you
Everything you change in the Editor saves as you go. If a call comes in, you switch apps or your phone closes the page to save memory, the Editor opens again on the block you were editing, and a drawing you’d started keeps the lines you’d drawn.
In Settings, a new handle or email address you were halfway through typing comes back too. Passwords are never kept. Closing a sheet on purpose throws away what was typed in it.
Publishing later
In the Editor, open ··· and choose Publish later (on a computer, it’s in the arrow beside Publish), or on Home tap Publish later, which shows once you have changes that aren’t live. Pick a day and time, from 5 minutes to 60 days ahead. Your bubble goes live as it was when you scheduled it.
The Editor shows when it goes live. If you keep editing, it says your newer changes aren’t included and offers Include it. Publishing now cancels the scheduled one, so an older version never comes back later. Cancel any time before then.
Your photos
Every photo you’ve uploaded is kept in Your photos, ready to use again as a link thumbnail, an image or in a gallery. Upload the same photo twice and it’s only stored once.
Drag photos from your computer straight onto your bubble: onto an image to swap it, or between blocks to add one (several make a gallery). You can also paste a photo with ⌘V. New profile photos and thumbnails can be cropped and zoomed first, and gallery photos put in order by dragging their handles.
Working with several blocks
In Links, Shift-click to select a run of blocks or ⌘-click to add one, or tap Select for checkboxes on a phone. Then move, hide, time, duplicate or delete them together. On your bubble, ↑ and ↓ move the selection and ⌥↑ and ⌥↓ move the blocks.
Any list you can put in order (Links, gallery photos, social icons) works by keyboard too: Tab to an item’s handle, press Space to pick it up, move it with the arrow keys and press Space to put it down. Escape puts it back where it was, and so does letting go well outside the list while you drag.
⌘C and ⌘V copy blocks, even to another bubble or tab. A long list gets a search box, and a header can fold away the blocks under it. At the end of the Add sheet you’ll find Starters, like an FAQ about shipping and returns, and Your blocks: anything you kept with Save as my block, up to 12. ⌘K finds any command or block by name.
Favourite spots
The Favourite spots block lists cafés, shops and studios you love that have a bubble on bubbleme. Add up to 8, each by its handle, like @kohi-cafe, with a line about why if you like. Visitors see each one with its name and photo, and tap through to its bubble. A spot that closes its bubble drops off by itself.
Undo and history
Undo and redo cover everything you do in the Editor, and each one says for a moment what it undid. On a computer, ⌘Z and ⇧⌘Z work too. Your last 50 steps are kept on this device, so a reload doesn’t lose them.
History (in the ··· menu on a phone) lists your recent changes and your published versions. Preview a published version, or restore it to go back to it. Give a version a name, like “Before the tour”, to find it again.
Sharing your bubble
Putting your link in your bio
Instagram: Edit profile, then Links, then Add external link. Paste your bubbleme link and tap Done.
TikTok: Edit profile, then Website. Paste the link and save. TikTok only shows the Website option on some accounts, like Business accounts and ones that meet its follower minimum, and it changes that minimum from time to time.
YouTube: in YouTube Studio, open Customisation, then Basic info. Add a link under Links and publish.
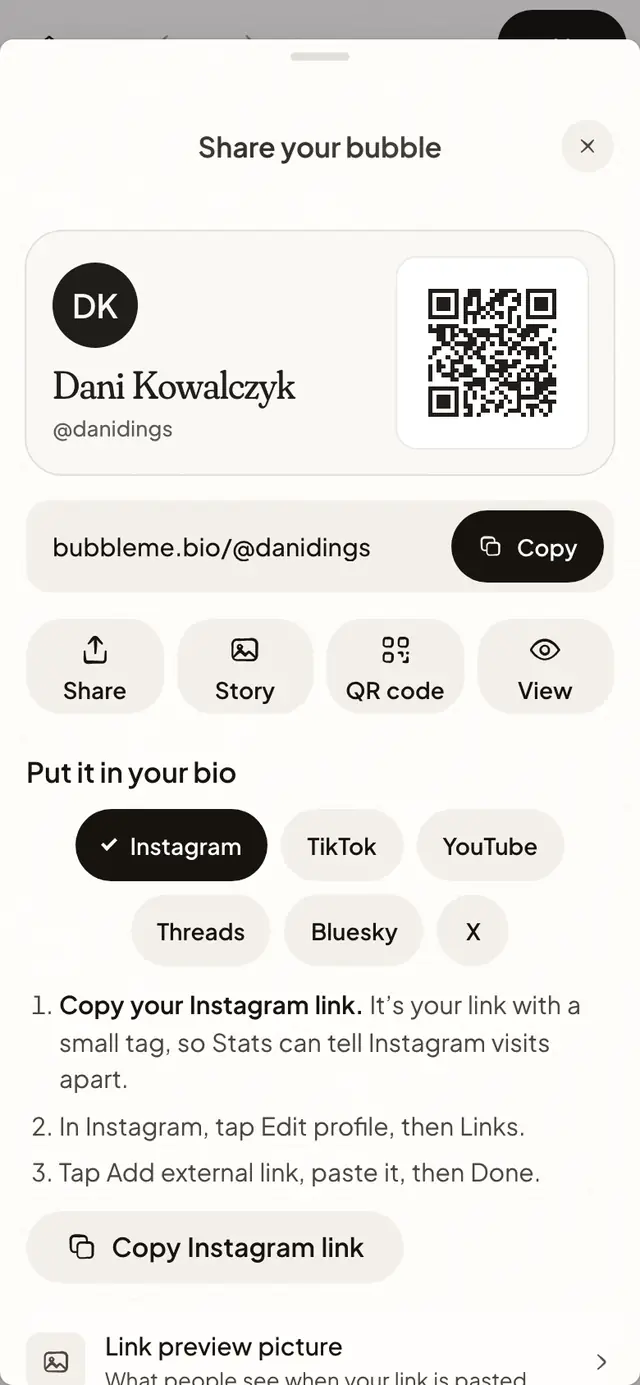
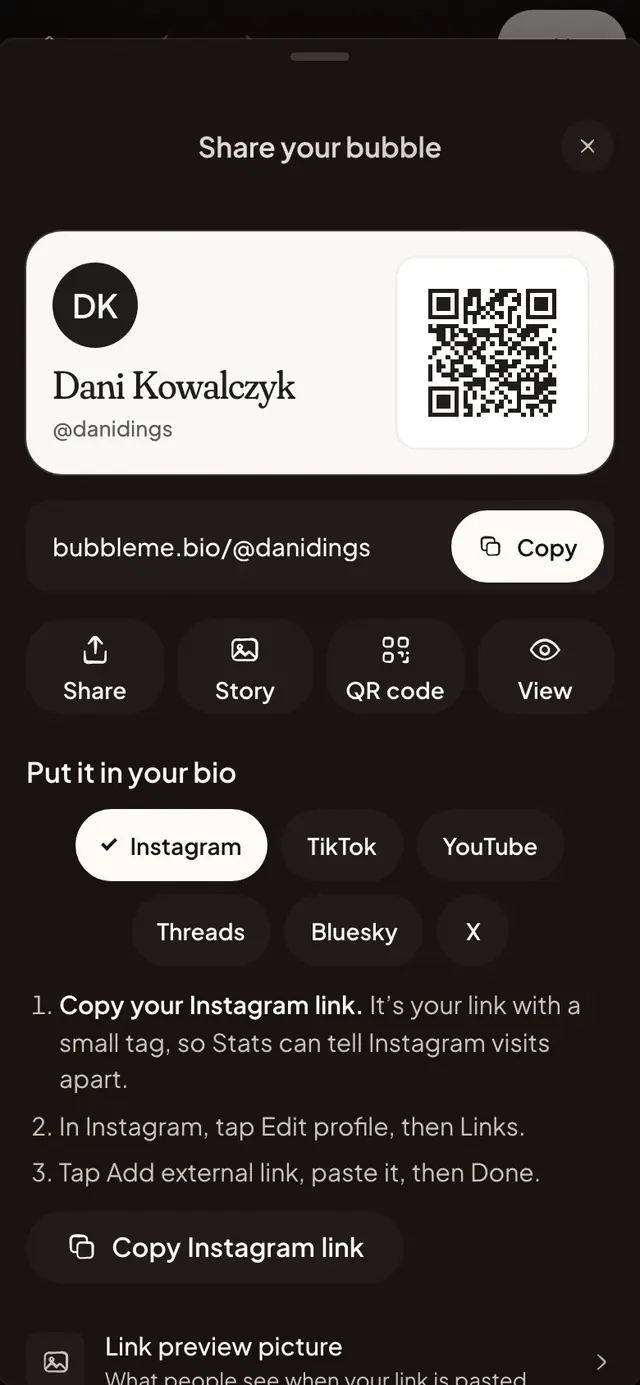
The Share sheet has these steps under Put it in your bio, for Instagram, TikTok, YouTube, Threads, Bluesky and X. Its copy button gives you your link with a small tag on the end, so Stats can tell visits from each app apart; your bubble looks the same either way.
A tap-to-open tag. Write your bubble’s link (bubbleme.bio/@ines.fires) to any NFC sticker or card with an NFC writing app. Phones open the link when they touch it, and nothing else is needed.
Home ticks it for you. Once someone opens your bubble from Instagram, TikTok, Threads or YouTube, the “Put your link in your bio” step on Home ticks itself, and a note says your first visit has come in. If you’ve done it and the step is still open, nobody has tapped through yet.
Adding a link from your phone’s share sheet
Found something worth sharing? Open the share sheet in your browser or another app and choose bubbleme. The link goes to the top of your bubble as a draft, with its title and picture filled in. You then choose Publish now, Keep as draft or Open the Editor.
Right now this works on Android, in the bubbleme app and the installed web app. On a computer or iPhone, paste the link into the Editor instead. If the link is already on your bubble, or the bubble is full (100 blocks), nothing is added and it says so. Business bubbles add links in the Editor.
Links that open in the app
People who find you in Instagram, TikTok, Threads, Facebook or Snapchat see your bubble in that app’s own browser, where a YouTube, Spotify or Amazon link would open a web page they’re not signed in to. On Android, bubbleme hands those taps to the real app instead: YouTube, YouTube Music, Spotify, Apple Music, SoundCloud, TikTok, Instagram and Amazon (Australia). If the visitor doesn’t have the app, the web page opens as before.
There’s nothing to switch on. It works by itself for links to those sites, and it doesn’t change how your links are counted.
Comment to DM on Instagram
Pick a post or reel and a word, like LINK. When someone comments that word, bubbleme sends them one Instagram message from your account with a link from your bubble. You can add a public reply under their comment too, like “Sent you a DM”, and give that reply up to 3 versions: each comment gets one at random.
To set it up, publish your bubble first, then open Comment to DM from Home or Settings and connect Instagram. Instagram doesn’t allow signing in from inside the bubbleme app, so connect it once on bubbleme.bio in your phone’s browser; after that you can manage it in the app. It needs a professional (creator or business) account, and you need to be 18 or over. Then choose New, pick the post, type up to 5 keywords and your message, and choose the link. Say “comment LINK” in your caption so people know.
Capitals, accents and punctuation don’t matter, so “link!”, “Link” and “#link” all count, but the word has to stand on its own: “linked” doesn’t. Your own comments never count.
A keyword reply doesn’t have to sit on one post. When you make one, choose under Listen for the keyword in: One post, Any post (every post and reel, old or new; a reply set on one post comes first), Next post (the next one you share, so you can set it up before you post), DMs (someone sends you the keyword in a message) or Story replies (someone replies to one of your stories with it). For DMs and story replies, switch on Allow access to messages in Instagram first: Settings, Messages and story replies, Connected tools.
A DM or story reply with your keyword gets one message back, within 24 hours of it, as Instagram requires. bubbleme looks at your DMs for your keywords only while a DM or story keyword reply is on.
To ask for emails, pick Sign-up form on your bubble as the link (it’s there once your bubble has a sign-up form), and write something like “Want the drop list? Tap here.” The link opens your bubble at the form, and people confirm their address by email, so nobody’s address is collected inside Instagram.
Every automatic message ends “Reply STOP to stop these.” If someone messages you just STOP (or UNSUBSCRIBE), they don’t get another automatic message from your Instagram account, from comments or DMs, until they send START. That holds even if you disconnect and connect again. The Comment to DM screen shows how many people have done that, never who.
To keep within Instagram’s rules and out of people’s spam, each comment gets one message and each person gets one per keyword reply, however often they comment. Messages go out within a day of the comment, at most 200 an hour; any over that wait for the next hour. bubbleme never sends a follow-up.
The Comment to DM screen shows how many messages went out and how many people tapped the link, for each keyword reply. A tap counts once per person in half an hour, and the previews Instagram, WhatsApp and other apps fetch to show a link never count. Pause sending any time with the switch. Disconnect deletes the Instagram sign-in, your keyword replies and their numbers, and links in messages already sent stop working.
QR code, Story card and link preview
The moment your bubble first goes live, set-up makes your first Story card from it: your photo, name and first links in your look, with your QR code. On a phone, Share puts it straight into your Story.
Any time after, open the Share sheet from Share on Home, or from ··· in the Editor. At the top are your bubble with its QR code (always dark ink on white, so it scans anywhere) and your link with Copy. Under them, Story makes a 1080 × 1920 Story card in your bubble’s look, QR code saves the code and View opens your bubble. Lower down, Link preview picture saves the 1200 × 630 picture people see when your link is shared, and QR & print has stickers, cards and posters with your code.
Pops
Visitors can tap the Pop button on your bubble. It’s a small way to say they liked it. Stats shows how many pops you’ve had, per day and all time.
Pops count live. When other people are popping your bubble at the same time, everyone watching sees the count climb and the bubbles spin, with a note like “2 others popping”.
Some pops are milestones: the 100th, 250th, 500th, 1,000th and so on. Whoever lands one gets a big celebration on their screen, anyone watching sees “Someone just landed pop 1,000”, and Stats shows when it happened.
Pop starts at the bottom, but you can move it. In the Editor, open More, then Links, and drag Pop to wherever you want it. “Made with bubbleme” stays at the bottom either way.
To keep your number to yourself, open Pop and switch off Show the count. People can still pop your bubble and you still see every pop in Stats, but visitors don’t see the total. This works on any plan.
Every look comes with a Pop style that fits it: Clean, Doodle, Pixel, Glass, Cottage, Grunge, Neon, Chrome, Candy, Ocean, Kawaii or Ink. Each one has its own bubbles and its own burst, and they all tap the same way. With bubble+ you can pick any style for any look in Pop’s settings.
With bubble+ you can also switch Pop off completely with Hide Pop. While it’s off, nothing is counted. Your total is kept for when you switch it back on.
For cafés, shops and other businesses
Your business bubble
Your bubble is what customers see: whether you’re open, where to find you, your menu, today’s special and buttons for ordering or reservations. It lives at bubbleme.bio/@yourbusiness.
Open Editor to change it. Changes save as you go, and customers see them when you publish. With business+, people on your team can edit it too (see Your team); on Free, only the owner can.
It can stand in for a website. Search engines and maps get your name, address, phone and opening hours from it.
A bubble someone made for you
Someone from bubbleme may have visited and made your business a bubble before you signed up: your name, hours, address and links, from what you told them or what’s on your shopfront. Nothing is copied from Google or other sites. It’s private: only people with its link or QR code can see it, and search engines don’t list it.
To claim it, open the link or scan the card and choose Claim this bubble, then sign up with your email. The link works once, so only one account can claim it. Once your email is confirmed, choose Make it mine to keep the bubble and pick your handle, or Start fresh instead to set up from the beginning with just your business name. Either way it isn’t public until you go live, and you can change anything in the Editor.
The link works for 30 days. After that the preview, its picture and its link are deleted, and the same happens if nobody claims it. If it has run out, ask the person who made it for a new one, or email hello@bubbleme.bio. If you don’t want it, do nothing. A preview only holds what was typed about your business, never anything about you.
Finishing your business bubble
A finished business bubble has what customers look for:
- your opening hours or menu (a gym or studio can use its class timetable, a venue What’s on, and a shop what it sells)
- your logo or a photo
- at least 2 things to tap, like an order button, directions or a call
- a line about your place, in a sentence
Until then, Finish your bubble on Home shows what’s missing, with one tap to each piece, and you can publish from there. Your bubble works at its link the whole time. Confirmed businesses are checked the same way. A business without a shopfront sees the card in Business settings, and can show products, photos or a video in place of hours.
Opening hours and holidays
Add Opening hours, switch on the days you open and set the times. A day can have up to 3 times, for a lunch and dinner split. A closing time earlier than the opening time runs past midnight. Hours follow the time zone at the bottom of the form, so check it matches where you are.
Customers see “Open now · closes 5:30pm” or “Closed today · opens Tue 7am”, worked out in your business’s time zone, wherever they are. Tap it for the full week.
Closed today is one tap and lasts until midnight. For a public holiday or a private event, add a date under Holidays and other dates. Past dates tidy themselves away.
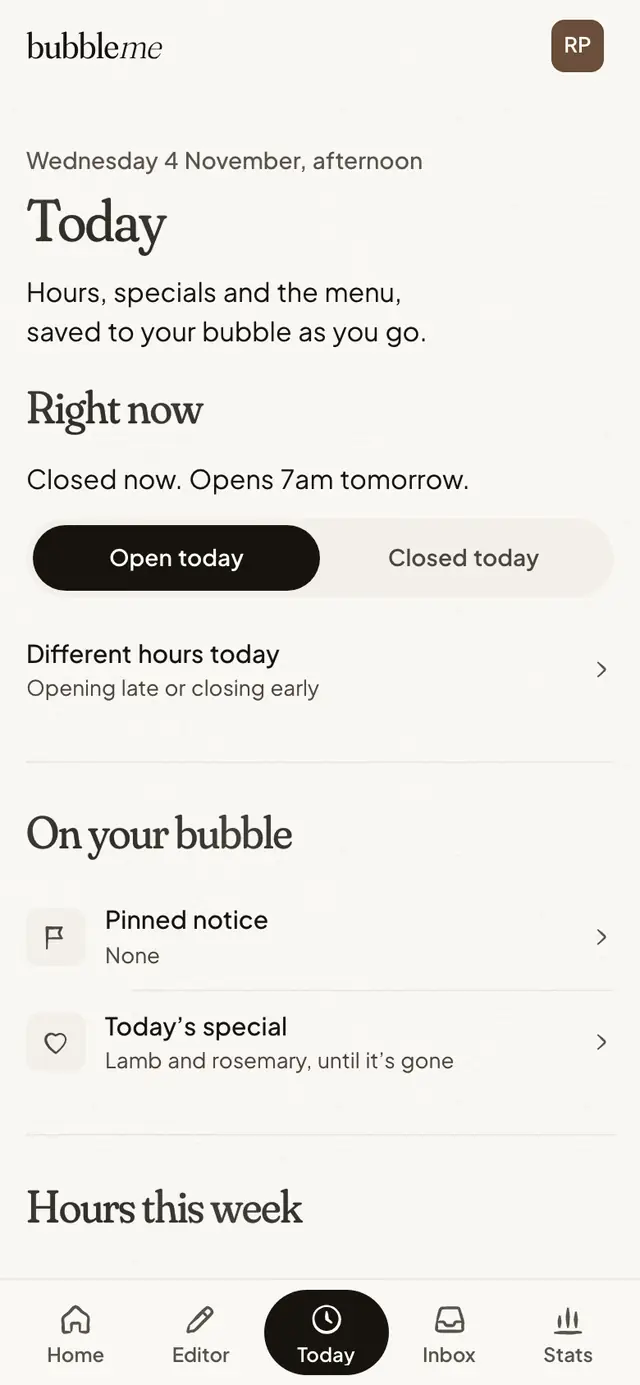
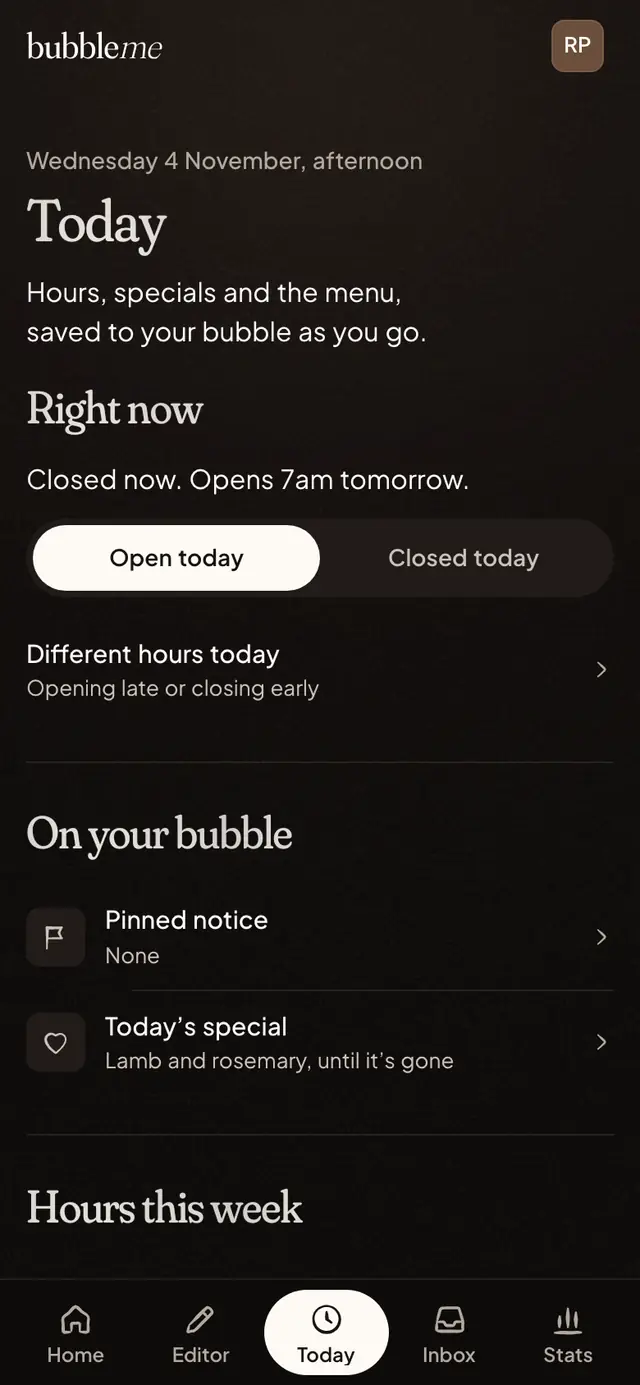
For one odd day, like opening late or closing early, use Different hours today in Today (see Today and the weekly check-in): choose when you open and close and tap Save. Customers see those hours straight away, and they go back to normal at midnight. Back to usual undoes it sooner. If you’re closed all day, use Closed today instead.
Today’s special
Add Today’s special for one thing worth checking back for: a new pastry, a guest roaster, an early close. Choose Today only or A time today and it comes off your bubble by itself.
Buttons and directions
Under Links, Add a button has ready-made buttons for your kind of business (Book a table, Book now, Order online, Get tickets and more), plus gift cards, catering, your website, a Google review link, call us and email us. Paste a link from Uber Eats, OpenTable, Fresha, Eventbrite and others and the button names itself. Type a phone number into a link and it becomes a call button.
Address & directions shows your address with Get directions, which opens Apple Maps or Google Maps. A map can show too. It only loads when someone taps it, so a customer’s details aren’t sent to Google before then.
Ordering, reservations and gift cards always open your own provider. bubbleme never takes payments from your customers.
QR codes, print and Instagram
QR & print has your QR code as PNG or SVG, and a window sticker, table tent, counter card and A4 poster in your bubble’s colours, each as a print-ready PDF with bleed for a print shop. The table tent and counter card open straight at your menu or timetable. The Wi-Fi card prints your network and password with a code that joins it; we don’t keep either.
Every printed piece has its own code, counted on its own. Change where one opens (your menu, timetable, main button, today’s special, your hours or how to find you) and what’s printed follows, with nothing to reprint. Screen mode puts your name, whether you’re open, today’s special and a big code on a tablet or TV by the till, and keeps itself up to date from Today.
The page also has a link for your Instagram bio. Use that one there, and Stats can tell visits from your QR codes and from Instagram apart, even when Instagram doesn’t say where people came from.
On business+ you can add up to 20 codes of your own, one for each table, flyer or market stall. Give each a name and download it as PNG or SVG; the table beside it shows its scans. If your plan ends, the codes you made keep working.
QR & print has 3 tabs. Print holds the pieces to download. Codes lists each printed piece’s code, where it opens and how many people scanned it, plus your own codes on business+. Reviews & Wi-Fi holds Screen mode and the Wi-Fi card.
Stats for your business
Stats shows visits, where they came from (QR code, Instagram and more), taps on Get directions, Call and your menu, your busiest days of the week, and Busiest times: a grid of days and hours, darker where more people looked, by your business’s time zone. Like the rest of Stats, it never stores who your customers are.
On business+, Stats also shows the whole last year, and the download has each day’s taps and where visits came from, for a spreadsheet of your own. The owner also gets a monthly report by email early each month: last month against the month before, where visits came from, your best QR codes and your busiest time. Turn it off in Business settings.
The line on Home saying when most people look (and the tip in Stats) waits until there’s enough to say: about 50 visits spread over 2 weeks or more.
Today and the weekly check-in
Today is for changes from behind the counter: open or closed today, different hours today, how busy it is right now (while you’re open), a pinned notice, today’s special, sold out, and saying your hours are right. Once your bubble is live, each one shows straight away, without publishing. Cafés, bakeries, restaurants, bars, salons, shops and studios have it as a tab; other businesses find the same under Right now on Home.
Once a week, on Monday morning in Australia and New Zealand, we email the owner last week’s numbers (visits, the change on the week before, taps on directions and calls, and the busiest hour) and a short summary of their hours. If they’re right, tap Hours are right in Today and your bubble shows “Hours checked this week”. Turn the weekly email off or on under Weekly check-in email in Business settings, or stop it from the link at the bottom of any of them. Stopping it doesn’t stop anything else.
Public holidays
A week or two before a public holiday in your state or territory, or in New Zealand, we ask whether you’re open: closed, usual hours or other hours. Your answer goes on your bubble at once. We work out where you are from your time zone; change it, or stop the questions, under Opening hours.
Services, classes and more
Your kind of business picks the blocks you start with. The menu block can show as a Menu (with dietary tags and sold out), Services (with how long each one takes) or a Price list. Gyms and studios get a Class timetable; venues and bars get What’s on. A mobile business can list the areas you serve instead of an address.
Under Address & directions, Good to know adds wheelchair access, dog friendly, outdoor seating, Wi-Fi, parking, kid friendly or card only. Opening hours can show last orders for the kitchen, and how busy you are right now. We’re hiring comes down by itself on the date you choose.
A button that stays in reach
Open a button in the Editor and switch on Keep at the bottom of the screen. While people scroll your bubble it stays at the bottom, and it steps aside when the button itself is on screen. One button can be pinned at a time; a new business starts with its main action pinned, like Order online or Book a table, and it shows once the button has a link.
A cover video
In the Editor’s Profile panel, Cover video puts a few seconds of video over your cover photo, like your coffee pouring or a look around your space. It plays muted on a loop. The cover photo shows while it loads, and for anyone who has asked their phone for less motion. MP4 or WebM, up to 3 MB. A cover video comes with business+; on Free your cover photo shows instead.
Your team
On business+, your team can have up to 5 people, counting you and invites not yet accepted. In Business settings, under Your team, type their email and choose what they can do: Can edit (the Editor, Quick edit, Stats, and Print and codes) or Quick edit only (today’s special, sold out, closed today and how busy it is). Then choose Send invite.
They get a link that lasts 14 days and make their own sign-in, so nobody shares the owner’s password. Business settings, the plan and deleting the business stay with the owner. Remove someone from the same list and they lose access straight away.
If business+ ends, everyone stays on the team, but only the owner can make changes until it’s back.
Confirming your business
A confirmed business gets the Official seal by its name: the stamp with a little shopfront. The owner can confirm it in Business settings in 4 ways:
- Email at your website’s address: we send a code to an address like hello@yourbusiness.com. Free email addresses like Gmail can’t be used, because anyone can get one.
- A record on your domain: add a TXT record to your website’s domain and check it.
- A call from us: no website needed. Give the phone number on your public listing, and your ABN if you have one, and we call to check.
- Your business registration: no website needed. Upload your ABN or ASIC certificate or business name registration (up to 3 MB). Someone from bubbleme matches it to your business name, usually within 2 business days, and deletes the file once they’ve checked it.
Email and domain checks show the website is yours. A person then takes a quick look, usually within a day, before the seal shows. Changing your business name, your bubble’s address or your website’s domain means confirming again.
If someone has made a bubble for your business, report it and choose This is my business. We’ll contact you to check.
Business settings
Business settings is where you set up the business itself and the account behind it.
Business details holds your logo, colour, business name, handle, kind of place, location, website and a line about you. The kind of place decides which blocks you start with, and changing the name or handle means confirming your business again (see Confirming your business).
Below it are Your team, Confirm your business, Weekly check-in email, Monthly report on business+ and Plan and Your own web address. Account has your email, password and passkeys, Your data, Sign out and Delete account. A business is deleted when its last owner deletes their account.
Stats and subscribers
What the numbers mean
Visits counts people opening your bubble. Someone who opens it again within half an hour is counted once. Your own visits while you’re signed in aren’t counted. Taps counts taps on your links, and tap rate is taps divided by visits.
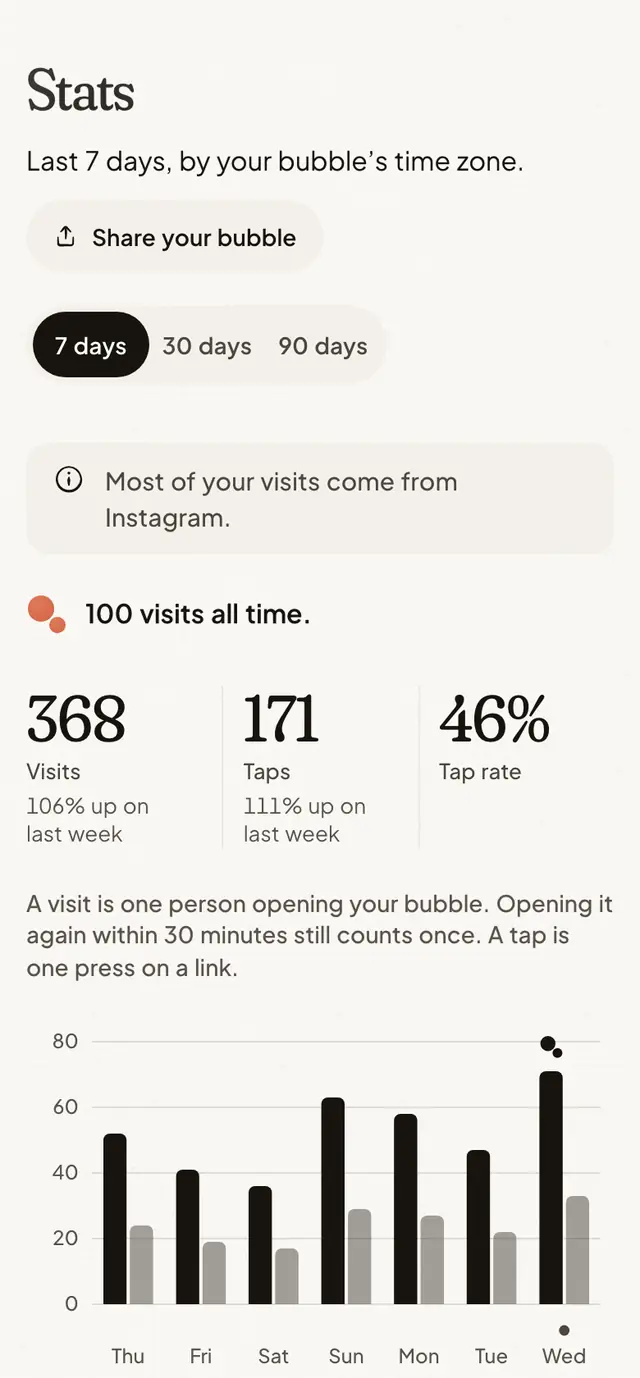
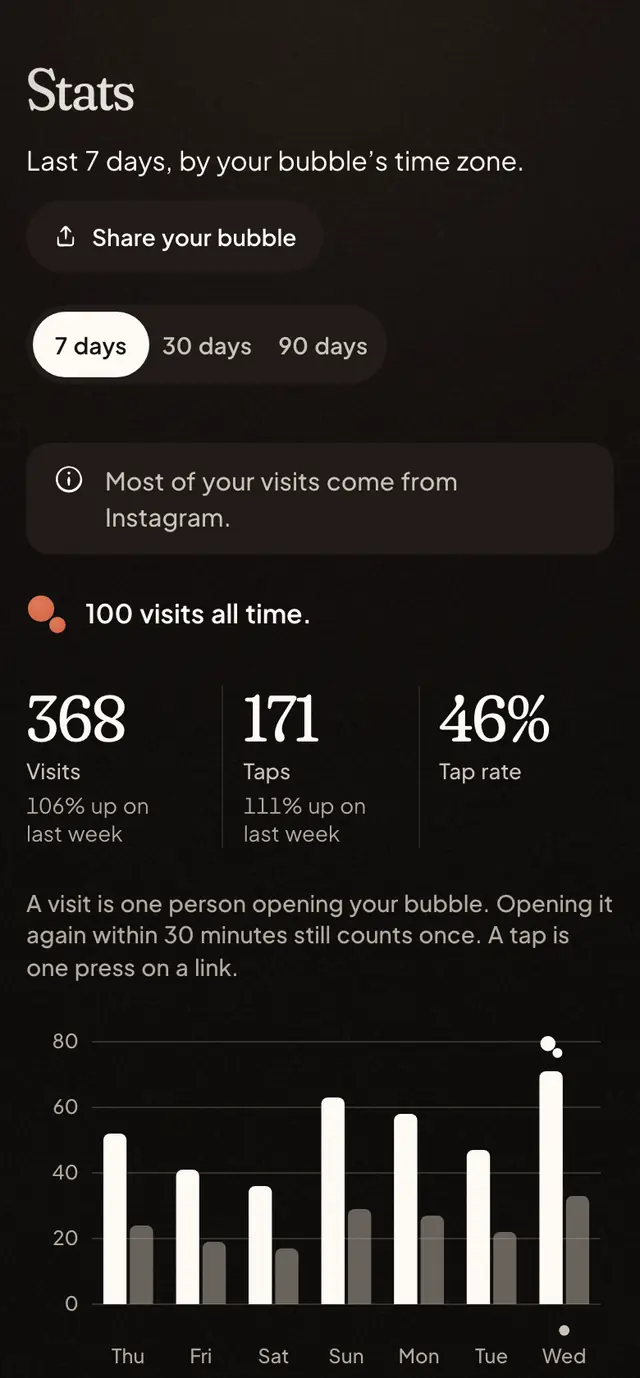
Switch between the last 7, 30 and 90 days. Where they came from shows each source and country, Devices shows what people used, and the Links table shows taps and tap rate for each link. Days follow your bubble’s time zone, set in Settings under Time zone. Open Show as a table to read the numbers out as text, or press Download these days (CSV) for a spreadsheet.
People who joined from your bubble counts people who tapped “made with bubbleme” at the foot of your bubble, then made a bubble of their own and confirmed their email. It’s a number only: we never say who. Hiding “made with bubbleme” with bubble+ stops new ones being counted.
Visitors can opt out of being counted on our privacy page.
Days that stood out
Under the chart, Days that stood out lists up to 5 days with a lot more visits than usual (at least 1.5 times your typical day, and at least 5 visits), newest first. Each line says where most of that day’s visitors came from, and what you did that day: a link you added, a change you published, or how many people scanned your QR code. The same things show as small marks on the chart.
It’s a pointer to what might have worked, not proof. Until you have a day like that, the list says so.
Newsletter subscribers
Add a Newsletter block and visitors can leave their email. They count as subscribers once they confirm it by email. Once someone has, Stats shows a Newsletter card with how many have signed up, and Download list (CSV) gives you the full list to copy into your email tool.
To write to them from bubbleme, open Stats and tap Write to them. It’s plain text, like a note to friends: a subject, then your words, with a blank line between paragraphs. Send a test sends one to you first, so you see how it looks. Each email comes from “your name via bubbleme”, ends with a link to your bubble, and has its own unsubscribe link. On Free you can send 2 updates a month, and 8 with bubble+, at most one a day.
Messages from your bubble
A Contact form block can save what visitors write to your bubbleme Inbox instead of opening their email app, which works even on a phone with no email set up. In the Editor, open the block and set Messages go to to My bubbleme Inbox. You choose for each block, and your email address isn’t shown on your bubble.
A message has a name, an email address and up to 1,500 characters of plain text. It arrives in Inbox, under Messages, and we email you (every message, at most one a day, or never: choose in Settings, under Notifications). Notifications on your phone follow the same choice. For a business, everyone on the team can read them. Reply by email opens your own email app, so your reply comes from your address.
Archive keeps a message out of the way. Mark as spam moves it to Spam, and later messages from that address go straight there. Tick Also send it to bubbleme and a person on our team looks at it. Delete removes it for good.
Messages are kept for 12 months, Spam for 30 days, unless you delete them first. They’re in your data download, and deleting your account deletes them. To keep spam down, each visitor can send a few messages a day, after 100 messages in a day we keep the rest without notifying you, links in messages aren’t clickable, and we leave links out of the emails we send you. Messages from visitors are for people 18 and over, like the rest of Inbox, so a block only saves messages once its owner has confirmed they’re 18 or over; until then it opens your email app as before.
Your weekly email
On Mondays we email you last week’s visits against the week before, your most-tapped link, your pops, where visitors came from, and one thing to try. If your bubble had no visits 2 weeks running, we leave you be. Turn off Weekly email in Settings, under Emails and notifications, or with the link at the bottom of the email.
Milestones
When your bubble passes 100, 1,000 or 10,000 visits, gets its first subscriber or turns a year old, Home shows it. Share to Story makes a picture with the milestone and your address, ready to post.
Inviting a creator
Once your bubble is live and your email is confirmed, Home shows three invite links. Send each to one creator. When they make their bubble live, you both get a month of bubble+. It adds to any bubble+ you already have, up to six months from invites in all.
Notifications on your phone
Once your bubble is live, or your first message arrives, Home offers notifications in one line: Turn on brings up your phone’s or browser’s own question, and Not now stops the asking on that device. Any time, turn on Notifications on this device in Settings, under Notifications (a business: in Business settings), to hear about a new message as it happens. In a browser on iPhone, add bubbleme to your home screen first. In the app, Apple or Google deliver each notification, so they see its short text. In a browser, your phone fetches the words from bubbleme itself. Turn it off the same way.
Under What we notify you about you choose what comes through: Messages (someone wrote to you through your bubble), Milestones (your first visit, then 10, 100, 1,000 and on), New subscribers (someone signed up for your updates) and Your week (Monday morning, last week’s visits and taps against the week before; off until you turn it on). The first 3 start on. Each choice counts for every device you’ve turned on. That list is for creators; a business gets the on and off switch.
We send at most 2 of these a day, and none between 9pm and 8am in your bubble’s time zone (set in Settings, under Time zone). Anything that comes up overnight waits for the morning, folded into one: “3 new subscribers”, not 3 buzzes.
Today’s numbers on your home screen
In the bubbleme app for iPhone, add the bubbleme widget to your home screen (touch and hold the home screen, tap Edit, then Add Widget) to see today’s visits and taps at a glance. Tap it to open Stats. Open the app once after adding it, so it can connect. The widget can only read those 2 numbers, never your bubble or messages. Signing out of the app, or removing the widget, disconnects it. If it stops updating, open the app once.
Getting around the app
In the bubbleme app, pull down on Home, Stats or Inbox to fetch the latest. Tap the tab you’re on to jump back to the top. To scan a bubbleme QR code, open the account menu and tap Scan a QR code. Help, the legal pages and bubbles open in a sheet over the app; tap Done to come back.
On Android, Back closes whatever is open on top first (a sheet or a menu), then goes back a screen, then to Home, and on Home it leaves the app. If your phone closes bubbleme to free up memory, opening it again takes you back to the screen you were on.
Collabs
Collabs are coming soon
Collabs are how creators and businesses will work together on bubbleme: a business posts a campaign or sends an offer, a creator says yes on their own terms, and the whole thing stays in one thread. They aren’t open yet.
Creators will find them under Collabs. Businesses will start them under Campaigns. Until then, the Collabs tab and the card on Home let you switch on Tell me when collabs open (businesses see Tell me when campaigns open) for one email when they do. Switch it off any time, or close the card if you’d rather not see it.
Everything else works today: your bubble, Stats, subscribers and business bubbles.
Account and sign-in
Passkeys
A passkey lets you sign in with your face, fingerprint or screen lock instead of typing a password. Add one in Settings, on each device you use. You can rename or remove them there too.
Signing in with Apple or Google
You can sign up and sign in with your Apple or Google account instead of a password. On the sign-up page, enter your invite and tick the Terms box first, then choose Continue with Apple or Continue with Google. Apple or Google has already checked your email address, so there’s no confirmation email: you go straight to setting up your bubble.
They only tell us your email address and an id for your account there. We never see your Apple or Google password. With Apple you can choose Hide My Email: we get a private address that forwards to your inbox, and that’s the address on your bubbleme account.
If you already have a bubbleme account with the same email, we’ll ask you to sign in the way you usually do first, then add Apple or Google to it. We never join accounts on the email alone, so nobody can get into yours just by having an Apple or Google account with your address.
In the bubbleme app for iPhone, Continue with Apple opens Apple’s own sign-in, right in the app. Continue with Google in the app needs iOS 17.4 or later; on an older iPhone, use Apple, your email or a passkey.
In Settings, under Apple or Google, you can add or remove either one. You can’t remove your last way to sign in, so add a password or a passkey first. If you signed up with Hide My Email and stop using Apple, change your email in Settings first, so our emails keep reaching you.
Changing your password
Passwords need at least 10 characters. Changing yours signs you out on your other devices. If you’ve forgotten it, choose Forgot password? on the sign-in page. The reset link we email works once, for one hour.
Changing your email
In Settings, under Email, enter the new address and your current password. You need a password for this: if you only sign in with a passkey or Apple or Google, add one first. We send a link to the new address, and the change happens once you open it. The link works for 24 hours, and the change signs you out on your other devices. The old address gets a link to undo it for 48 hours.
Changing your handle
Settings lets you pick a new handle. Your old link keeps working for 30 days and sends visitors to the new one. After that, someone else can claim the old handle, so update your bios within the month.
Keeping your bubble out of search
Settings has a switch under Visibility. Turn on Hide from search engines and Google and others are asked not to list your bubble. Already-listed pages can take a few weeks to drop out.
Your bubble stays live either way, and anyone with your link can still open it.
Lost phone or shared computer
Sign out everywhere in Settings ends every session, including the one you’re using. Then change your password if you think someone else knows it. Resetting your password from the sign-in page also removes your passkeys and Apple or Google sign-in, so only you can get back in.
Downloading your data
Download my data in Settings, under Privacy and data, gives you everything you’ve made in one file, whenever you like, on any plan, without asking us: your account, your bubble and its past versions, your numbers and your subscriber list. You can download it up to 5 times an hour. A business owner’s file includes the business.
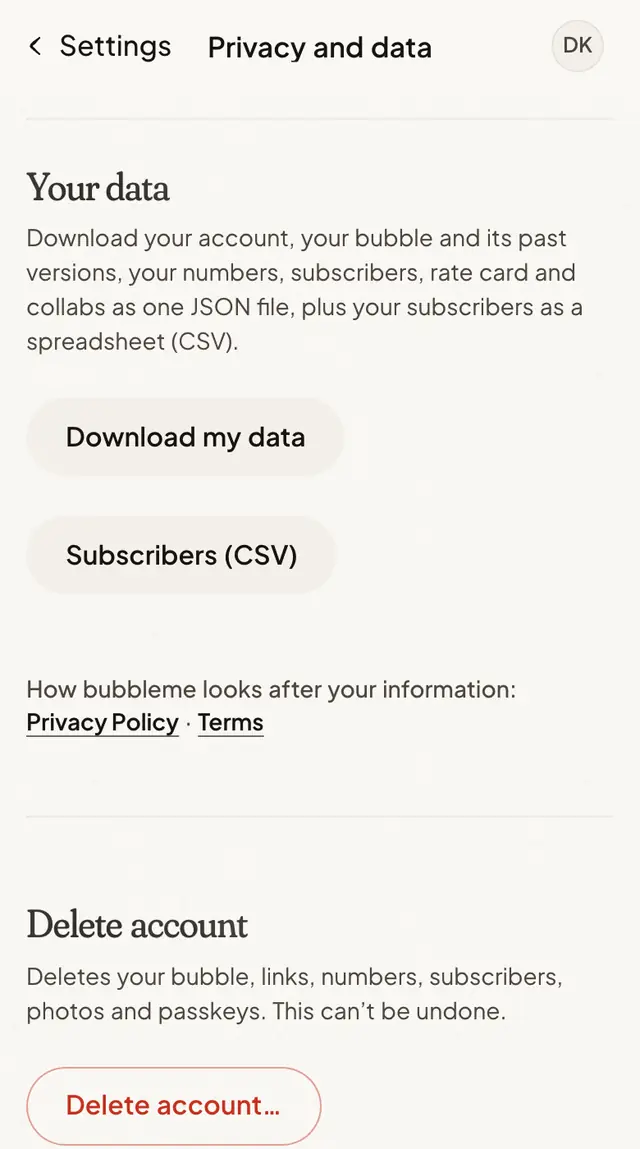
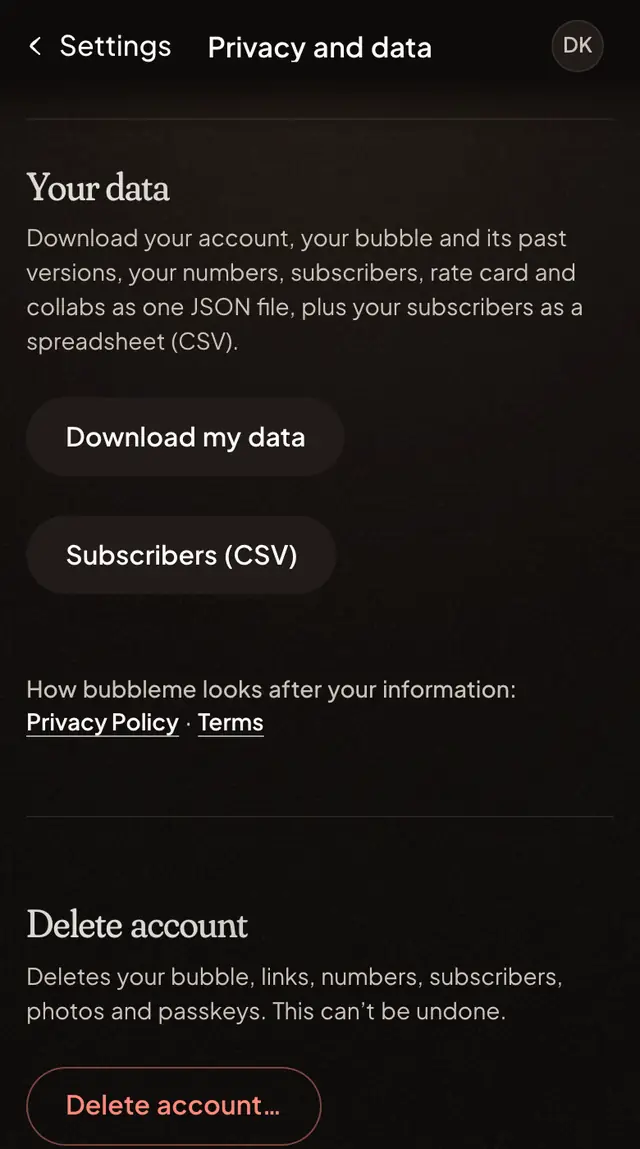
If you ever leave, Delete account in Settings takes your bubble down straight away (see Deleting your account). Your handle is then kept for 30 days, so nobody can step into it while your old link is still out there. After that, anyone can claim it.
If you’re moving somewhere new, add a link to your new home at the top of your bubble and publish it before you go, so anyone with your old link or QR code can find you. When you’re ready, delete it.
Our status page shows whether bubbleme is running normally right now.
Deleting your account
Delete your bubbleme account in the app or on the web: Settings, then Privacy and data, then Delete account…, then type your handle and choose Delete my account. If you can’t sign in, email hello@bubbleme.bio from your account’s address and we’ll delete it within 30 days. Deleting removes your account, bubble, uploads, statistics, subscribers and passkeys and any Apple or Google sign-in straight away. Messages you sent us from Help are deleted too. A few records stay for a while, as our Privacy Policy explains: reports and our decisions about your account (about 13 months), a scrambled copy of your email for some things (such as an unsubscribe, for 3 years), and, for 30 days, what lets only you take your handle back. A business is deleted when its last owner deletes their account.
It can’t be undone. Your handle stays reserved for 30 days, so old links don’t land on someone else, then it’s free for anyone. You’ll also be asked to confirm it’s you, and deleting cancels any paid plan straight away.
What’s in Settings
Settings lists its groups: Your bubble, Account, Notifications, Plan and Privacy and data, and, where they’re available, Connected for accounts and tools. Tap a group to open it, and ‹ Settings takes you back to the list. A business has its own Business settings.
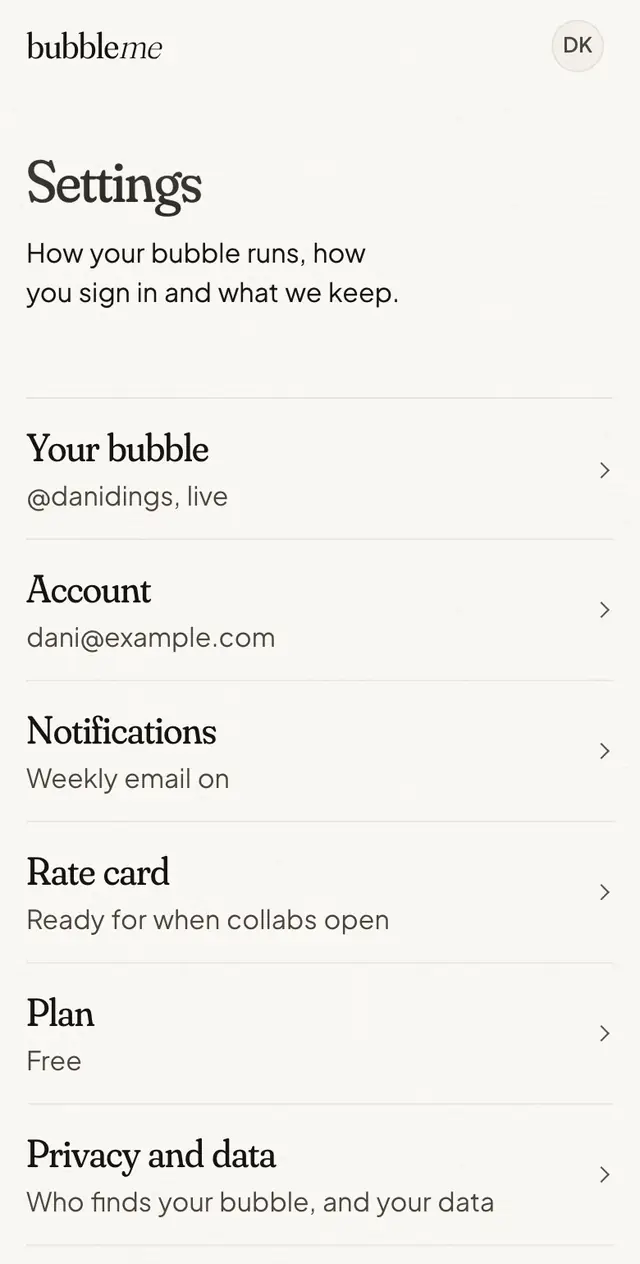
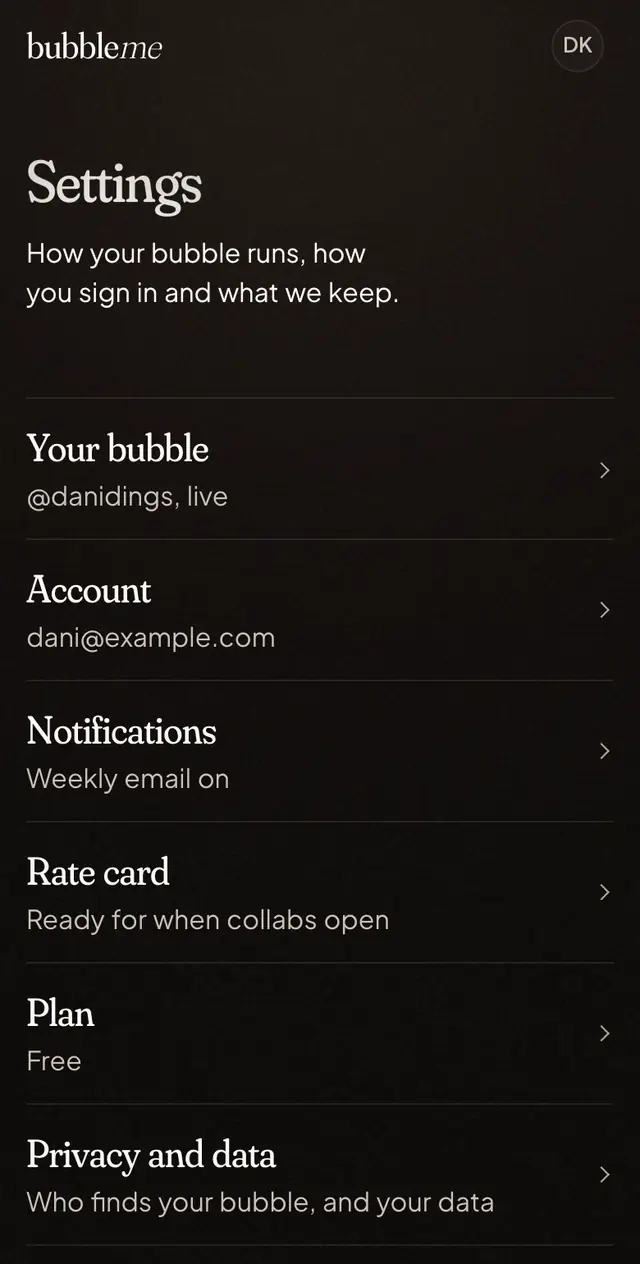
Your bubble has your handle, the time zone your Stats days, timed blocks and quiet hours follow, and Move in from Linktree, plus your own web address. Account is how you sign in: email, password, passkeys, Apple or Google and Sign out everywhere. Notifications covers the weekly email, messages and notifications on this device. Plan is your plan and billing. Privacy and data keeps you off Explore or search engines, downloads everything, or deletes your account.
Connected accounts proves your Instagram, TikTok or YouTube is yours. Comment to DM sets up automatic replies on Instagram.
The Official seal
What the marks next to a name mean
Only one mark ever sits next to a name: the Official seal. It means we’ve checked the bubble really is who it names. Tap it and it says so.
The seal with a shopfront is an Official business: a business that confirmed it’s really theirs.
A small tick on a social icon means the creator connected that Instagram, TikTok or YouTube account by signing in, so it really is theirs. It takes the bubble’s own colours.
Plans and paying
What’s in bubble+
bubble+ adds every look in full, including the ones marked +: moving backgrounds, extra fonts and button styles. It adds Tilt glints on Shine, moving photos and your own stickers, lets you hide “Made with bubbleme” and Pop, each on its own, lets all your saved looks and shines go live, sends 8 email updates a month to your subscribers (Free has 2), and adds livelier motion.
Links, stats and your newsletter list are free for every creator.
It also lets your bubble show at your own domain, like links.inesfires.example. See Using your own web address.
bubble+ is A$6 a month or A$48 a year, and business+, for businesses, is A$30 a month. Prices in Australian dollars, including GST. Get it in Settings, under Plan; the bubble+ page shows a bubble both ways first, and Pricing compares the plans. To cancel, see Paying for bubble+ or business+, and cancelling.
Paying for bubble+ or business+, and cancelling
A creator gets bubble+ in Settings, under Plan: A$6 a month or A$48 a year. A business gets business+ in Business settings, under Plan: A$30 a month. Plans are bought on the website, not inside the bubbleme app. Checkout is on Stripe, so bubbleme never sees your card. Prices in Australian dollars, including GST.
Manage billing, in the same place, opens Stripe’s page for your plan. There you can change your card, switch between monthly and yearly, download receipts and invoices, or cancel.
If you cancel, your plan stays on until the end of the period you’ve paid for, and you can renew it from Manage billing until then. For a yearly plan, we email you before it renews.
If a payment doesn’t go through, Plan says so and Stripe tries again over the following days. Your plan stays on while it does, so update your card in Manage billing. If Stripe still can’t take the payment, your plan moves to Free.
When a plan ends, your live bubble keeps its look until you next publish. Then bubble+ touches go live in their free version, and 3 of your saved looks and shines can go live. Nothing you made is deleted. On a business without business+, teammates stay on the team and only the owner can make changes. Your own address keeps showing your bubble for 14 days, then sends visitors to your bubbleme address.
Deleting your account cancels your plan straight away. Refunds follow our Terms.
What happens to bubble+ touches on Free
You can try almost any look or setting in the Editor (uploading your own font needs bubble+). When you publish on Free, bubble+ touches go live in their free version, and the share sheet lists what changed. Compare with bubble+ in the Editor lets you compare both before you publish, whenever your bubble uses any bubble+ touches.
Using your own web address
With bubble+ (for a business, business+), your bubble can show at an address you own, like links.inesfires.example or inesfires.example. Your bubbleme.bio address keeps working too.
Open Settings (for a business, Business settings), go to Your own web address and type it in. We show the exact DNS records to add where you manage your domain, which is usually where you bought it:
A TXT record named _bubbleme (with your subdomain on the end, if you use one) proves the domain is yours. It proves the domain is yours before anything shows on the address. Keep it in place so nobody else can claim the domain.
A CNAME record points a subdomain like links.inesfires.example at bubbleme. A bare domain like inesfires.example uses an A record on @ instead, plus an optional CNAME for www.
While Settings is open it checks for the records by itself and ticks each one off. Once both are in, the secure connection (https) usually comes on by itself within a few minutes. If it doesn’t, the steps in Settings say what to do. On Cloudflare, set the record to DNS only (the grey cloud). On GoDaddy, change the @ A record that points at the parking page instead of adding a second one. On Namecheap, delete the parking page’s records first.
If your plan ends, the address keeps showing your bubble for 14 days, then sends visitors to your bubbleme.bio address. It comes back as soon as the plan does. To stop using it, choose Remove web address, then delete the DNS records.
Safety and reporting
Reporting a bubble
Use the report form, or the report link at the bottom of any bubble. For most reports your email is optional: leave it out to stay anonymous, or add it to hear what we decided. Copyright, trademark, defamation and “This is my business” reports need your name and email.
If a bubble is pretending to be someone with an Official bubble, choose Pretending to be someone else. When its name or handle matches an Official creator’s, the report goes straight to the top of our queue.
If someone is in danger, or for child safety or intimate images shared without consent, email safety@bubbleme.bio. We act on those within 24 hours. If someone is in immediate danger, call your local emergency number first.
Copyright and trademark
Our copyright page explains what a notice needs and where to send it.
If we took something down
If we take your bubble down or suspend or delete your account, you can ask us to look again with the appeal form. We take a fresh look at it, and we email you the outcome. If we undo a take-down, open the Editor and publish when you’re ready to go live again.
Still stuck
Write to us here, or email hello@bubbleme.bio. Tell us your handle. We reply by email, usually within 2 business days. We read every message. Automated tools help us sort them and draft replies, and a person on our team reads, approves and sends every reply and makes every decision about your account.
Thanks. We’ve got your message and we’ll reply by email.
Thank you for telling us
A person on our team will read your message first. If you’re going through something hard right now, you don’t have to wait for us. These people are there for you, any time, for free:
- In danger right now? Call 000 (police, ambulance, fire).
- Lifeline: call 13 11 14 or text 0477 13 11 14, day or night.
- Kids Helpline: call 1800 55 1800, for anyone aged 5 to 25.
- 1800RESPECT: call 1800 737 732, for family, domestic or sexual violence.
We’ll also reply by email.